Hey folks, Have you ever wondered how to easily get documents electronically signed on one of your applications. We are going to use docusign for this process. In this particular post we can use docusign API to send e-signatures to recipients and also get the proof of the signature as well.
Today we will be learning and resolving some issues/problems that we encounter during integrating Docusign API with PHP. We will be using a docusign e-signature rest api example with PHP.
Outline
Our goal is to create a signature flow from our backend to allow a user to sign their request. we will follow the following steps:
- Configure the document.
- Connection to docusign.
- Creation of the signature flow.
- Customisation of the signature interface.
- Monitoring the progress of the signature.
- Go live process.
Implementation choice
The backend of our application runs on PHP which can use docusign libraries to carry out this process but we are going to develop our own API request instead. This gives us an upper hand if in future we are going to migrate to other electronic Signature service providers even if they do not provide any third party libraries to do so.
Getting started with docusign
Creating a development account
The first step would be to create a developer account with docusign. This account will be the one you use throughout your development process but it will be different from the production environment account which we will discuss in the go live process.
To create an account with docusign simply go to docusign developer account application form and fill in the requested information then once you verified your account you should be able to connect to the development environment.
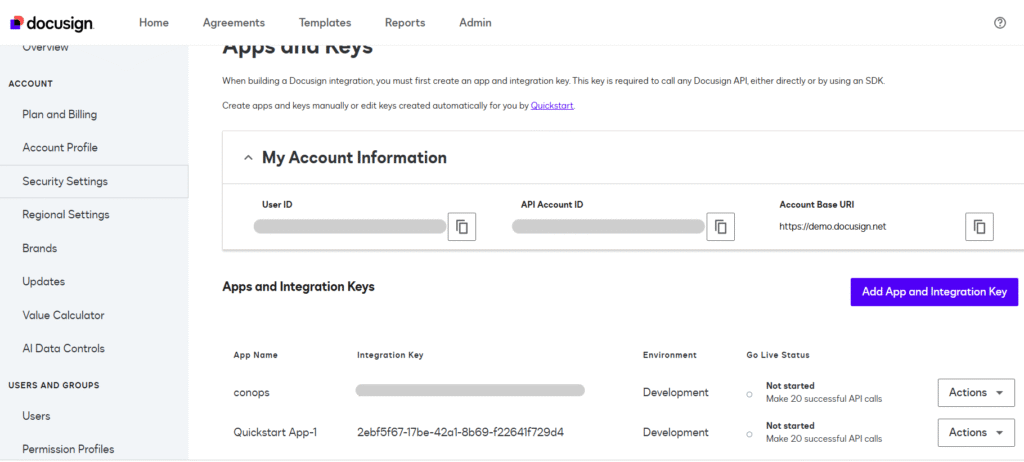
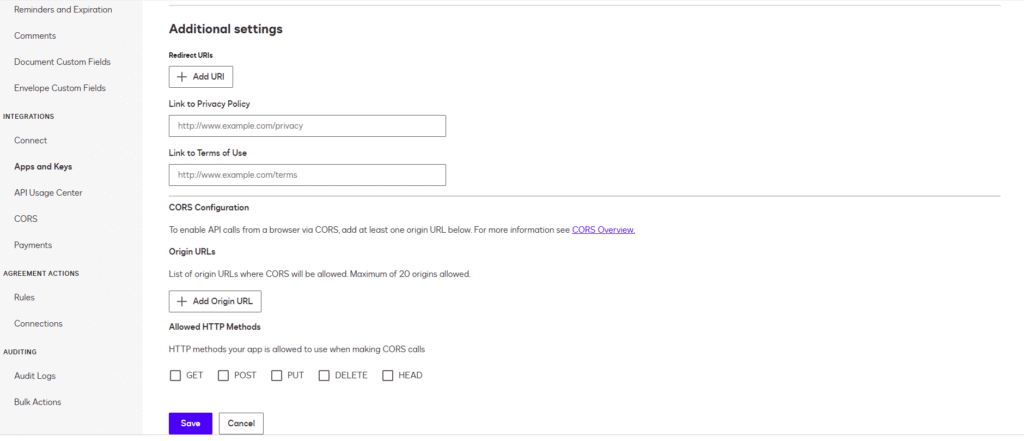
Registering the app
The next step is to register an app under the settings > integrations > apps & keys menu. click on the add app and integration key button. choose the name for your app and click create, you should now see that your integration key has been created for your app. Under the additional settings section you should add a redirect uri on which docusign will redirect you after you login from the app.
Creating delegated access to your app
Now, when you have created your app and generated the required keys you need to allow it to act on your behalf and interact with your docusign account.
This step is very easy all you need to do is open the following URL
https://account-d.docusign.com/oauth/auth?response_type=code&scope=impersonation signature&client_id=<YOUR_INTEGRATION_KEY>&redirect_uri=<YOUR_REDIRECT_URI>
in your browser.
Please replace your integration key and your redirect URI with your integration key generated for the app and redirect URI with the one you previously added when configuring your application. if everything is fine you should see a page similar to the following:
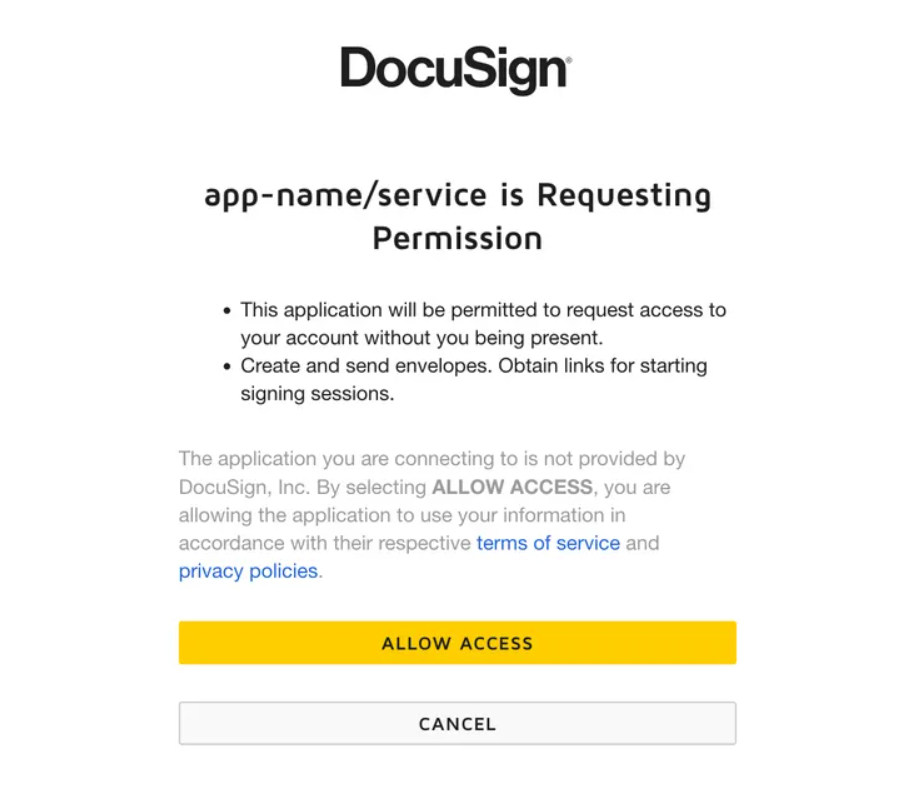
Once you allow access you will be able to generate envelopes and interact with your docusign account using the API’s.
Libraries Used:
Guzzle Http:
We are using GuzzleHttp for sending and receiving http requests. E.g receiving an access token and sending a document for signing.
Firebase JWT:
For Generating secure access tokens and it Supports RS256 encryption, required by DocuSign.
Also Read : How to store the data in AWS S3 using Laravel?
Generating a DocuSign Access Token
The function getAccessToken() generates a JWT based token for API authentication.
function getAccessToken()
{
	$integrationKey = 'xxxxxxx-Ractify-xxxxxxxxxxxxx';
	$userId = 'xxxxxxxxxx-Ractify-xxxxxxxxxxxxxxx';
	$authServer = 'account-d.docusign.com';

	$privateKey = file_get_contents(__DIR__ . '/private.key');

	$jwt = [
    	'iss' => $integrationKey, // Issuer
    	'sub' => $userId,     	// Subject (User ID)
    	'aud' => $authServer, 	// Audience (Auth server)
    	'iat' => time(),      	// Issued at
    	'exp' => time() + 3600,   // Expiry (1 hour)
    	'scope' => 'signature impersonation',
	];

	try {
    	$token = JWT::encode($jwt, $privateKey, 'RS256');

    	$client = new Client();
    	$response = $client->request('POST', "https://$authServer/oauth/token", [
        	'form_params' => [
            	'grant_type' => 'urn:ietf:params:oauth:grant-type:jwt-bearer',
            	'assertion' => $token,
        	],
    	]);

    	$data = json_decode($response->getBody(), true);
    	return $data['access_token'];
	} catch (Exception $e) {
    	echo 'Error generating access token: ' . $e->getMessage();
    	exit;
	}
}
How It Works:
- Read the private key from private.key.
- Create a JWT token using integration key, user ID, and expiration time.
- Send a request to DocuSign to exchange JWT for an access token
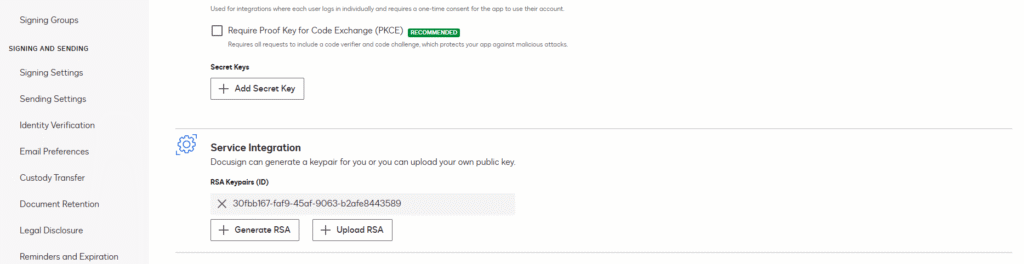
You can generate a private key in the app settings of your docusign account app in Service Integration by generating an RSA keypair as shown in below screenshot:
What this does is:
- Generates a JWT token and encodes it with RS256 encryption.
- Exchanges the JWT token for an OAuth access token.
- Returns the access token for further API calls.
Preparing the Document for Signing
The function createEnvelopeWithDocuSign($formData) dynamically creates a document and sends it for signing. We are sending a form with different form fields populated with data from the database and using docusign to place signature tabs on it and sending for signing to two recipients at the same time.
How It Works
- Fetches the access token.
- Reads a document template (document.php) and fills in form data.
- Converts the HTML document into a base64-encoded string.
- Defines recipients and their signature fields.
- Sends an API request to create an envelope.
function createEnvelopeWithDocuSign($formData)
{
$accessToken = getAccessToken();

	$baseUri = 'https://na4.docusign.net';
	$accountId = 'xxxxxxxxxxx-Ractify-xxxxxxxxxxxxxx';
	ob_start();
	$data = $formData;
	include 'document.php';
	$htmlContent = ob_get_clean();
	// Replace placeholders with form data
	foreach ($formData as $field => $value) {
    	if (!in_array($field, ['signerName1', 'signerName2'])) {
        	$htmlContent = str_replace("{{" . $field . "}}", $value !== null ? strval($value) : '', $htmlContent);
    	}
	}
	// Debug: Save generated document for review
	file_put_contents(__DIR__ . '/debug_document.html', $htmlContent);
Configuring the Envelope
An envelope in DocuSign contains:
- Email subject & message
- Documents (HTML encoded in Base64)
- Recipients & signature positions
$envelopeDefinition = [
	'emailSubject' => ' Subject for sending to user '
    	. htmlspecialchars($formData['firstname']) . ' '
    	. htmlspecialchars($formData['lastname']) . ' - '
    	. htmlspecialchars($formData['planstartdate']) . ' to be signed',

	'documents' => [
    	[
        	'documentBase64' => base64_encode($htmlContent),
        	'name' => ' Document',
        	'fileExtension' => 'html',
        	'documentId' => '1',
    	],
	],
Recipients and signature fields:
 'recipients' => [
    	'signers' => [

        	[
            	'email' => htmlspecialchars($formData['summaryemail']),
            	'name' => htmlspecialchars($formData['lastname']),
            	'recipientId' => '1',
            	'routingOrder' => '1',
            	'tabs' => [
                	'signHereTabs' => [
                    	[
                        	"anchorString" => "{{signerName1}}",
                        	"documentId" => "1",
                        	"pageNumber" => "1",
                        	"anchorXOffset" => "0",
                        	"anchorYOffset" => "0",
                         	"anchorUnits"=> "pixels",
                         	"scaleValue"=> "1",

                    	],
                	],
            	],
        	],

        	[
            	'email' =>htmlspecialchars($formData['author_email']) ,
            	'name' => htmlspecialchars($formData['agent_name']),
            	'recipientId' => '2',
            	'routingOrder' => '1',
            	'tabs' => [
                	'signHereTabs' => [
                    	[
                        	'anchorString' => '{{signerName2}}',
                        	'documentId' => '1',
                        	'pageNumber' => '3',
                        	'anchorXOffset' => '0',
                        	'anchorYOffset' => '0',
                          	'anchorUnits' => 'pixels',
                           	"scaleValue"=> "1",
                    	],
                	],
            	],
        	],
    	],
	],

	'status' => 'sent',
],
Note:
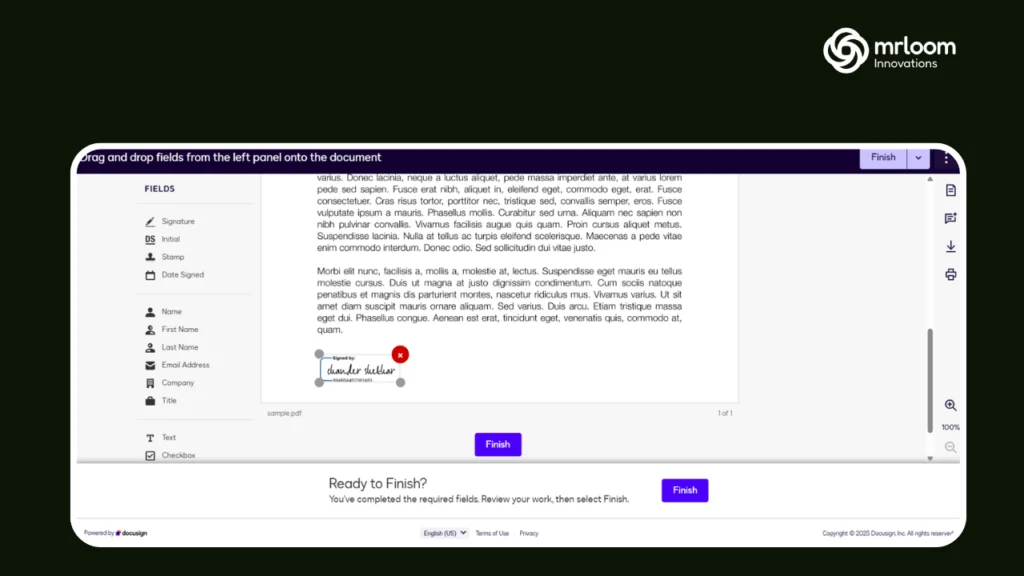
For Signature tabs on your html document it looks for the exact string that you placed above in the anchor string that is {{signerName1}} for the first signer and {{signerName2}} for the second one. And x and y offsets are the position coordinates of these signature fields on the html document. To place these according to your needs you need to do a hit and trial with the positions.
Routing order above means in which order you want the emails to be fired. If it is 1 for the first signer and 2 for the second one the email will be delivered to the first signer and when he signs it the email will be sent to the second signer. If you want the mail to be sent to both signers at the same time then make the routing order 1 for both.
The example shared here is a special customised one according to what was required but you can start by just sending to one signer at first.
Sending the Envelope
try {
    	$client = new Client();
    	$response = $client->request('POST', "$baseUri/restapi/v2.1/accounts/$accountId/envelopes", [
        	'headers' => [
            	'Authorization' => "Bearer $accessToken",
            	'Content-Type' => 'application/json',
        	],
        	'body' => json_encode($envelopeDefinition),
    	]);

    	$data = json_decode($response->getBody(), true);

    	return [
        	'status' => 'success',
        	'message' => 'Envelope created successfully! Envelope ID: ',
        	'response' => $data,
    	];
	} catch (Exception $e) {
    	return [
        	'status' => 'error',
        	'message' => 'Error sending envelope: ' . $e->getMessage(),
    	];
	}
}
Sends a POST request with the document and recipient details.
If successful, returns the Envelope ID.
Conclusion
This PHP script automates electronic document signing with DocuSign API. It Authenticates using JWT tokens
Generates a dynamic HTML document
Sends it for signing using API calls
Next Steps:
- Customize the document template (document.php).
- Implement error handling for failed API calls.
- Track signing status using DocuSign webhooks.